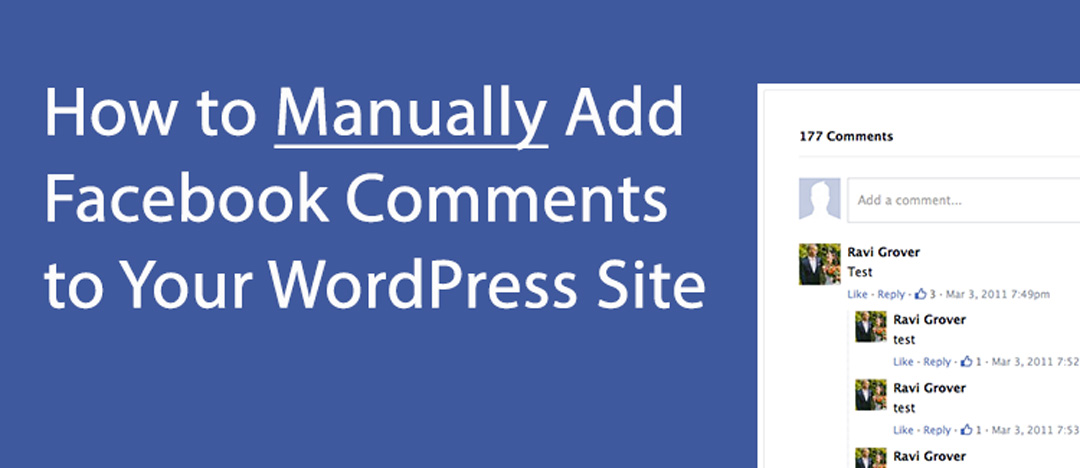
Around 75% of the adult population in the United States has a Facebook account, so installing Facebook Comments to your website can be a great way to increase the engagement and “shareability” of your blog posts. If you use WordPress as your website’s main content management system, it’s even easier to setup Facebook Comments onto your website.
The simple 3-step process below is the best way to manually add Facebook Comments to your WordPress website without using a plugin.
Why is it better to manually install Facebook Comments rather than use a plugin?
Here are just a few reasons:
- Plugins tend to have unnecessary code in addition to serving their core functions, which may slow down your site. Especially if you have a lot of WordPress plugins installed already. It’s always best to limit the amount of plugins you have, when you can.
- It’s more secure. Plugins, especially non-updated plugins, are prone to hacker attacks and malware injection. Which can cause nightmares for your site if not protected properly.
- And lastly, it’s not that hard. As you’ll discover below, the whole process only takes a few minutes to complete.
Step 1: Initial Setup of Facebook Comments
The first step is to visit the official Facebook Comments Plugin developer page and setup your comments settings. While you don’t need to generate the code from this page as we provide it all below, it’s good to test it out and get a feel for what it will look like on your website.
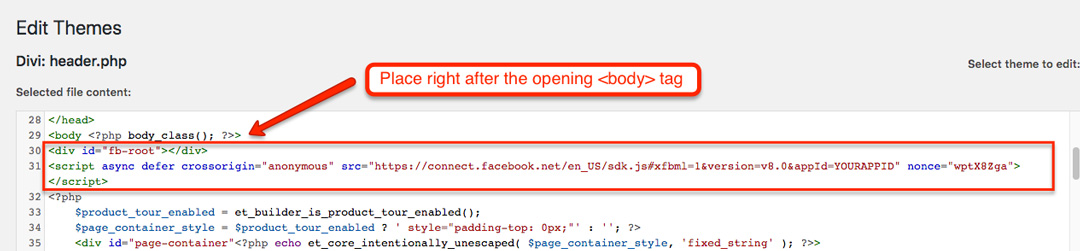
Once you’re done testing… go to Appearance > Editor inside your WordPress backend.
Place the code below right after the opening <body> tag (usually located in the header.php file).
Without Facebook APP ID
<div id="fb-root"></div>
<script async defer crossorigin="anonymous" src="https://connect.facebook.net/en_US/sdk.js#xfbml=1&version=v12.0" nonce="vtHh10Cd"></script>
With Facebook APP ID
Use this code (with FB App ID) if you plan to moderate comments.
<div id="fb-root"></div>
<script async defer crossorigin="anonymous" src="https://connect.facebook.net/en_US/sdk.js#xfbml=1&version=v12.0&appId=YOURAPPID" nonce="vtHh10Cd"></script>
Note: To add your Facebook App ID, append the src attribute with &appId=YOURAPPID (as seen above in red).
It’s also recommended by Facebook to add the following meta tag in the <head>
section:
<meta property="fb:app_id" content="YOURAPPID" />To view the full list of tags and display options, visit the Facebook Comments settings section.
This is an example of what the code could look like when adding it to WordPress:
Example of header.php code
Step 2: Installing Facebook Comments Code
Place the code below where you would like the Facebook Comments to show up on your website.
Unlike the code given to you from the official Facebook Comments site, the code below utilizes dynamic URL functions within WordPress to make the FB Comments code unique for each page of your website.
Most themes use a file named single.php to manage the blog post section.
<div class="fb-comments" data-href="<?php the_permalink(); ?>" data-width="100%" data-numposts="10" data-order-by="social" data-colorscheme="light"></div>Here’s an example of what the code could look like when you add it to WordPress:

Example of FB Comments Code Placement in WordPress
Facebook Comments Settings
- For dynamic URLs, edit the data-href section to include <?php the_permalink(); ?>
- To enable lazy loading, add the boolean data-lazy attribute and set to “true” (default is “false” and not listed)
- For mobile and/or responsive comments, change data-width to a percentage such as 100% to make it have a fluid/responsive width and/or use the boolean attribute data-mobile to use the mobile-optimized version of FB Comments when detected (auto-detected).
- Use data-numposts to control the amount of comments that show up per comments page.
- The order of comments can either be displayed by social signals “social” (default), also known as “top“, or by the latest date/time it was given (“time“, “reverse_time“) through the data-order-by tag.
- Edit the color theme through the data-colorscheme tag. Make it either light (default) or dark.
Changing the Language
If you’d like to change the default language of your Facebook Comments just update the src value from en_US (English, United States) to whichever language and locale you’d prefer.
src="https://connect.facebook.net/es_MX/sdk.js#xfbml=1"This would change the default language to Spanish and the country to Mexico.
Facebook supports many ISO languages and country codes. Learn more about Facebook localization.
Step 3: Test and Verify
Once you are finished placing the two snippets of code on your site, visit a few of your blog posts to verify that the Facebook Comments are functioning and displaying properly.
Each page/post should have its own unique set of comments and be generating them automatically.
The final product should look something like this:
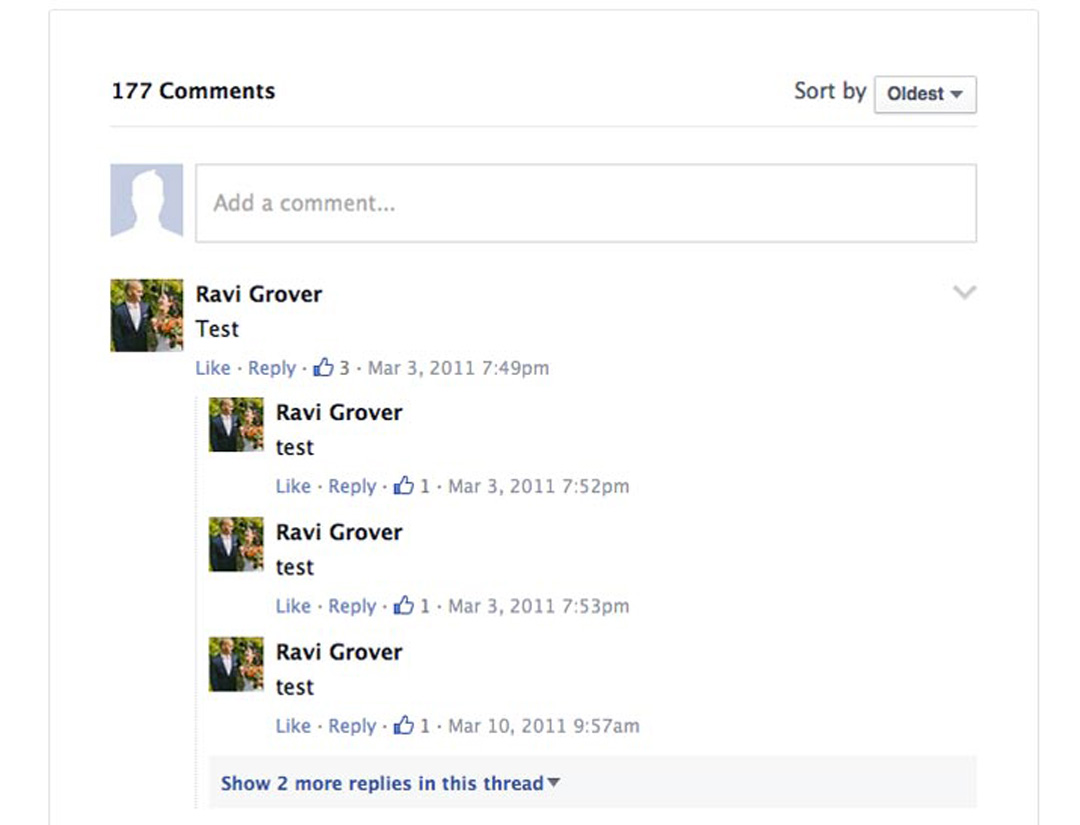
Example of Facebook Comments working properly
That’s it!
I hope this post was helpful for you in installing Facebook Comments on your WordPress website.
Ryan Bradley
Latest posts by Ryan Bradley (see all)
- Desktop vs Mobile Search Results on Google - December 10, 2021
- How to Add Facebook Comments on WordPress Without Using A Plugin - September 26, 2020
- How to Implement HowTo Schema - May 14, 2020


Are you able to put the script in there from an external JavaScript file?
Yes, thanks for pointing that out Philip.
Could look like this:
<div id="fb-root"></div>
<script src="fb-javascript-file.js" type="text/javascript"></script>
Always place mine in the footer right before . Moved to header. Thanks
Hi, when I view my source, my “http:” was gone and ended up like this:
data-href=”//localhost:3000/wordpress/living-room-set-up/”
As you can see its start with “//” only… any idea why this happened?
Btw I’m still running on a localhost server for development. Thanks!
This is most likely due to the localhost server you’re using. It should be fixed/updated automatically when you make the site live on the main website hosting server.
Thanks Ryan, this guide is really useful.
Mine first gave me an error in “a red box” that said: “href not supported” and now it does not show up on any post. Any ideas on how to fix this pls?
Hi David, are you placing the Facebook Comments code in the text editor section of WordPress or in the actual theme file? If it’s in the text editor section of a post or page it won’t work properly as WordPress doesn’t allow PHP to be inserted there.
Work great, thanks Ryan!
Thank you for this great step-by-step guide!
I have used the same structure as said above…
1) Placed the snippet in the header.php file just below body tag.
2) and after that in single.php file placed that div as well (fb-comments) whole section as above..
But it’s not working.
Hi Gulshan, when you say it’s not working do you mean it’s showing an error or it’s just not appearing? Having not seen the site my best guess is that you may be placing the comments code in the wrong spot (your #2). Most themes have the comments section in the single.php file but I have seen other themes with the comments located somewhere else. So I would just double check to make sure that your comments code is in the correct place, and file.
Great post! Thank you very much 🙂
Thanks mate, it works perfectly.
Thanks mate, now I know how to install Facebook comments on WordPress sites. I was confused with all of this. But you make me understand with a step by step guide.
Great articles! Keep doing it.
How can I change the language? I have changed this line:
“js.src = “//connect.facebook.net/en_US/sdk.js#xfbml=1&version=v2.8″; fjs.parentNode.insertBefore(js, fjs);”
From en_US to tr_TR but it didn’t work. Thank you.
Hi Cem, according to Facebook’s language guidelines for Comments, it looks like you did it perfectly. Maybe the error has to do with the other half of the code? If not, I would check out their guidelines again to make sure there’s nothing else that needs to be implemented or changed for your country and/or language. Hope that helps.
Great article on how to set up Facebook Comments without a plugin. My only concern is that Facebook Comments are not being imported to the WordPress database.
Do you know of a way to get Facebook Comments imported into the WordPress database?
This would be a great achievement of it could be done!
Hi Ken, I don’t know if that would be possible as we’re using FB’s code which is outside of WordPress. With that being said, if you’re able to figure it out please let me know!
Hi Ryan, if I insert this code, will it replace the existing WP comments box?
Hi Pam – No, you would have to turn off comments in the Settings > Discussion section if you don’t want the original WP comments box to show.
Great post, thanks. 😀
So this is how simple it is to add Facebook comments to your WordPress blog.
This post is so helpful and made the task easy. Thank you
Thanks VERY much for this article, and for continuing to support it. I’ve struggled a long time trying to overcome the problem of each Facebook comment appearing in the comments list of EVERY post on my site.
QUESTION:
This is my first WordPress site, and I’m building it in a localhost environment (MAMP virtual server on Win7). After posting a comment, the FB comment box does not reset and is not ready to accept the next comment. I find it necessary to REFRESH the page in my browser.
Have you encountered that?
Do you know it to be a factor related to the localhost environment?
Are you aware of any other complications related to the localhost environment?
Thanks
Hi Tom – I’ve had others comment about encountering errors when dealing with a localhost (MAMP) environment as well. It appears the website has to be live in order to properly call the dynamic URL function of WordPress (the_permalink). Hope that helps, good luck!
Thank you for your guide, I’m really happy I could implement Facebook comments without a plug-in. However, in my case the second statement did not work, as my single.php that came with the theme was already populated with PHP and variety of hooks.
So instead of using <?php the_permalink(); ?> I had to use ‘. get_permalink() .’
(Careful, there are double and single quote operators in the second statement!)
I hope this help those who have issues.
PS: This method also worked on my localhost install, but that might be due to my setup.
Hi Tay – Thanks for sharing your situation and your fix as well. I hope this helps anyone else who may experience this issue.
Nice information, easily added the Facebook comment box to my website. Thanks 🙂
Hi Ryan – this is an interesting post but I’m confused. Where does the App ID go?
A Facebook App ID is not required but I just added a snippet to this post to include one for those that want to utilize an App ID for their comments. Thanks for pointing this out.
Hey there, I was wondering: is there a way (that you know of) that would make the dynamic URL function available on a RapidWeaver website?
Hi Giacomo – I’m not too familiar with RapidWeaver but I would just try to find the "<?php the_permalink(); ?>" equivalent, as seen in Example 2.
If none exists, you may just have to try a traditional PHP fix such as $_SERVER[‘REQUEST_URI’] or something similar depending on your setup.
Thanks! This was driving me crazy going through the terrible plugins out there to do something that ended up being so simple.
After reading this article, I was enable to add Facebook comments to my WordPress site very easily without using any plugins. Thank you for sharing this.
This was so helpful to get Facebook comments without having to use a plugin. Thanks!
Code works awesome, but I am getting a link on the bottom that says “Facebook Comments Plugin”. How to remove this link?
I don’t think you can.
Thank you! The step-by-step guide was perfect, was able to add FB comments without a plugin.
Comments only show after you refresh the page. Is there a way to make it automatically update as users type in their comments?
Hi, Kay! Im having the same issue. Did you find a solution for that?